I bet you were expecting an elaborate holiday dessert this month, but how about something you actually need at this time of year: delicious breakfasts for your busy life that includes no time for breakfast. Yeah. I definitely need that. I enjoy a decadent breakfast probably more than the average person, but… the holidays are coming, ready or not, and it’s time to get real. All the shopping, party-going, and traveling (or getting ready for travelers)… If you double this recipe, you have breakfast or snack every weekday for the month. How’s that for a life hack?
TIME 1 Hour (15 minutes active)
TOOLS
9×12” pan
parchment paper
large mixing bowl
2 small pots
rubber spatula
kitchen scale
measuring spoons
liquid measuring cup
chef’s knife
ruler
oven mitts
INGREDIENTS
6 oz dried apricots, chopped
6 oz sugar
6 oz water
2 tablespoons honey
8 oz butter, melted
1 tablespoon vanilla
8 oz all-purpose flour
8 oz rolled oats
8 oz brown sugar
½ teaspoon baking soda
1 teaspoon salt
METHOD
Heat the oven to 325F.
Spray the pan with cooking spray and line with parchment and set aside. I like the parchment to extend over the edges so I can easily lift the bars when they’re ready to cut.
Stir together the apricots, granulated sugar, water, and honey in one small pot. Let simmer over medium heat until the apricots plump and the liquid becomes syrup consistency. Allow to cool slightly.
Melt the butter over low heat in another small pot with the vanilla. Meanwhile mix the oats, flour, brown sugar, baking soda, and salt into the large mixing bowl until evenly combined.
When the butter has melted, pour it into the mixing bowl with the oats and work the mixture until evenly combined. Pour half of the mixture into the prepared pan and press firmly to form the base of the bars.
Pour the cooled apricot syrup over the base of the bars and spread evenly with a spatula.
Crumble the rest of the oat mixture over the apricots and bake for 25 minutes, turning halfway.
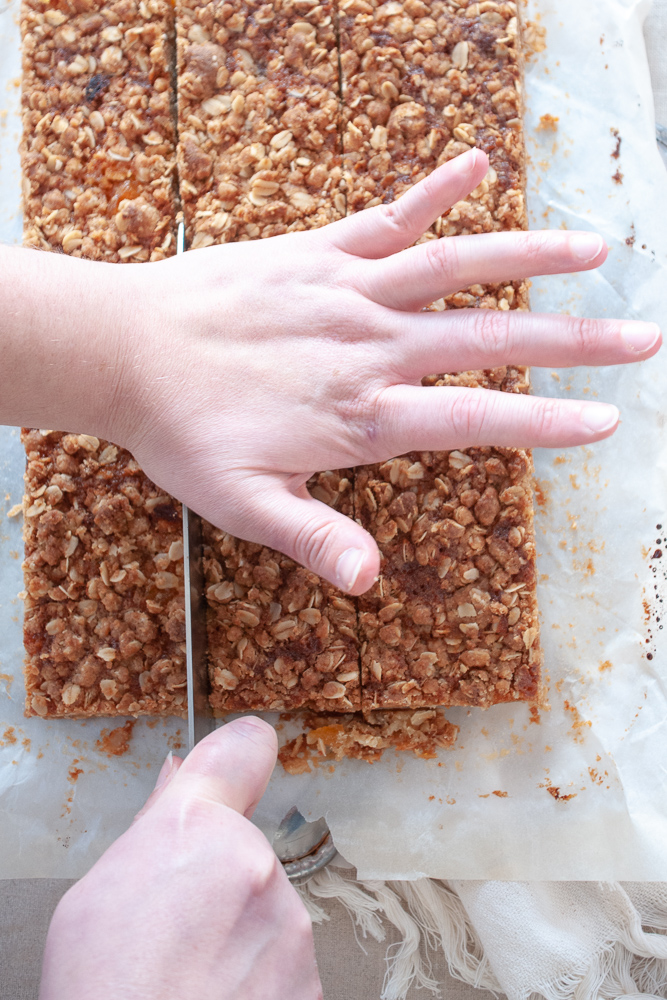
Allow to cool before cutting with a sharp knife.
These bars are great individually wrapped and stored in the fridge or freezer. I don’t recommend leaving them in a container on the counter (although that would be fine as far as food safety) because you will probably just want to eat them. Stow individually wrapped bars in your bag for an afternoon snack or breakfast on the go to make your life a little easier.
Collaboration is a key element to my business that not only makes it fun and interesting but also rewarding. I love learning about other people and discovering and bouncing ideas around to create something that doesn’t yet exist. Now that the dust is starting to settle from making Gather Studios into a beautiful, functional space, I’ve been thinking of ways I could collaborate even further with the other studio tenants that are here alongside me, and in ways we can share those collaborations with you.
There are so many talented people in this shared office building doing really interesting things, Megan of Triangle Pastry Company is just one of them. She specializes in no-frills, seasonally inspired menu of sweet and savory treats. She sells them locally at the Apex Farmers Market as well as the Wake Med Farmers Market. She also delivers throughout the Triangle and her items are available to pickup by appointment here at Gather as well.
I had asked Megan if she would make some treats for our Grand Opening celebration a few weeks ago and she showed up with among other things, a pan full of a creation she had invented called a S’mores Bar. To say it was amazing would be an understatement. Seriously, if you are local, you need to get some of her foods, they are that good.
Meanwhile, the two of us will be sharing a recipe here once a month with me photographing and styling it and her writing and sharing the recipe.
I’ve got more fun collaborations coming up here too in the future so keep your eyes out for that. I’ll let Megan take it away from here:
Here’s Megan:
Summertime nights in the South are the stuff of nostalgia… full of barefoot potluck BBQs, glittering with lightning bugs, tiki torches, local beer, and backyard games. I grew up playing badminton, croquet, baseball, and volleyball while my dad ran the grill and my mom… well, basically did everything else (you know how that goes). After dinner, my brother and I hunted for the perfect marshmallow skewer sticks in the woods, and my dad carved the ends into little points with a pocket knife. Roasting those gelatinous, sugary jet puffs over an open flame, then peeling off that one blackened side, was the highlight of warm weather cuisine for me. When we got out the Nabisco Honey Maid graham crackers and a couple of Hershey’s chocolate bars, I was a happy camper.
Then I grew up, learned how to bake, and (sadly) couldn’t have a grill on my apartment patio. Enter S’more Bars. These are the perfect potluck dessert… they’re easily transportable and can be cut to almost any size to serve as many people as you need. Bonus: they’re a little bit gooey, without having to be kept warm.
I’m just going to channel Ina Garten right here and say, if you can’t be bothered to make your own graham crackers, store-bought is fine. If you do want to make your own honey grahams, though, I promise you won’t be disappointed.
TIME: 1 Hour
TOOLS:
kitchen scale
food processor
s-blade
stand mixer
whisk attachment
mixer bowl with handle
small pot
medium pot
small aluminum bowl
fine mesh sieve
chef’s torch
12”x16” sheet pan (x2)
parchment paper
large (12”) whisk
silicone spatula
offset spatula
measuring spoons
liquid measuring cup
paring knife
INGREDIENTS
BASE:
12 ounces graham crackers
4 ounces sugar
¾ teaspoon salt
¼ teaspoon cinnamon
5 ounces butter, melted
FILLING:
1 pound chocolate (Note: dark chocolate flavor comes through stronger than milk chocolate.)
4 ounces heavy cream
MARSHMALLOW TOPPING:
7 egg whites
14 ounces sugar
¼ teaspoon salt
½ teaspoon cream of tartar
1 tablespoon vanilla bean paste
METHOD
To Make the Graham Cracker Base:
Preheat the oven to 350 degrees.
Line a 12×18 sheet pan with parchment paper. DO NOT USE A SILPAT! I REPEAT, DO NOT USE A SILPAT if you will be cutting the bars in the pan (which is what I recommend).
Melt the butter in a small saucepan over medium heat.
Grind together the graham crackers, sugar, salt, and cinnamon, in a food processor as finely as possible. Stream in the melted butter.
Turn the mixture out onto the sheet pan and spread it evenly over the surface. Press firmly into place so that there are no loose crumbs. Pressing another pan of the same size on top of the mixture helps to ensure a level crust.
Bake at 350 degrees for 15 minutes, rotating halfway through the baking time.
Remove from oven, and immediately press the crust firmly into the pan again with another sheet pan. It will be hot, so take care to keep your fingers insulated with a dry towel or potholder.
Set aside to cool while you make the chocolate filling.
To Make the Chocolate Filling:
Place chocolate and cream in a double boiler over a pot of simmering water. If you don’t have an actual double boiler, just use a small aluminum bowl set over the top of a small saucepan. This is what I use, because… convenience.
Stir gently as the chocolate melts.
Once you have a uniform consistency, hold the fine mesh sieve over the graham cracker crust and pour the chocolate filling through the sieve onto the base.
Spread the chocolate evenly over the surface of the base with the offset spatula.
Rinse the spatula (you will use it for the marshmallow topping) and allow the chocolate to set while you make the marshmallow topping.
To Make the Marshmallow Topping:
This is a basic Swiss meringue. If you’re into cakes, you might have your own recipe that I’m sure would work just fine. You can also swap other flavors in place of or in addition to the vanilla. Orange zest, cardamom, anise, chili powder, mint, espresso powder, you name it.
Fill a medium pot with about one or two inches of water, and bring to a simmer.
Mix the cream of tartar, salt, and sugar together in the bowl of the stand mixer. This bowl must be completely clean and dry for optimal development.
Add the egg whites to the sugar mixture, and whisk to incorporate.
Set the mixer bowl over the medium pot of simmering water and whisk continuously.
*I recommend a bowl with a handle, because it makes it easy to keep the bowl from spinning obnoxiously in this step, without steam-burning your fingers.
After a couple minutes, when the mixture starts to thicken and begins to turn opaque versus translucent, use the back of a spoon to extract a tiny amount. Feel the texture. If the sugar is not dissolved, keep whisking for another minute. It should feel silky-smooth, with no sandy sugar bits remaining.
When your sugar is dissolved, turn off the burner, remove the mixer bowl from the pot, and lock it onto the stand mixer with the whisk attachment. You may want to use a towel or potholder, because the bowl will be hot.
Whip the whites on medium-high (KitchenAid Speed 7 or 8) until the bottom of the bowl feels cool to the touch, about ten minutes. At this point, there should be nice firm peaks when you remove the whisk from the bowl and it should make a distinctive smacking sound. Add the vanilla bean paste and incorporate.
Check to make sure the chocolate is set before you start plopping the marshmallow on top. If it is firm to a gentle touch, go ahead and dump the meringue out of the bowl.
Use swooping motions to spread the meringue over the entire surface of the bar. It is pretty forgiving, so you can push it around a bit until you get a look that you like. You could also use a pastry bag with fancy tips to pipe designs, if that’s your style.
The last step is torching the meringue. You’ll get that nice toasted marshmallow effect. Follow the manufacturer instructions on your kitchen torch, but four to six inches between the meringue and the torch is generally a reliable distance for me.
Slice into 24 bars and use a square spatula to lift and serve.These should store well in an airtight container in the fridge for a couple days, but I have to be honest, they have never stayed around longer than a potluck dinner for me to tell.
My family’s Thanksgiving traditions are very Rockwellian. We gather at my parent’s house with lots of family, prepare foods together from scratch (though my Mom & Grandmother typically did the lion’s share of the work) and sit at the formal dining table that is pre-set with my Mom’s table setting handiwork that she prepared weeks in advance: foraged branches, seasonal decor, candles, fine china. Of course, there’s always a touch of a mother-daughter meltdown a la Lady Bird in there too. 😉
My Grandmother passed away last year and this will be the first without her there. She was always in charge of the apple pie, a perfectly sweet concoction in an of-course handmade crust. Though she really fostered my love of cooking by making lots of things, this became her of-late specialty. Even as her health was failing, as she was getting shots in her damaged eyes weekly, as her rheumatoid arthritis was flaring, and a myriad of other things, she would putter around in the kitchen making her apple pie and cleaning the dishes.
Obviously, my Grandmother meant a lot to me and had a big impact on my own perspectives. Namely, despite my own challenges and tribulations, I find it more important to stay focused on others and their challenges versus my own, and on continuing to pursue the things that I love despite obstacles, these are a few of the more significant things that I learned from her.
That said, I have been in a deep retreat mode for awhile ever since I broke my wrist, one year ago, yesterday. I have actually pulled back from many things in an effort to regroup and heal from intense burnout. I could see it coming for a few years prior when my head and my heart were in direct stalemate with each other but I chose to keep powering through. When you own a business oftentimes there is a direct correlation between how much work you put forth and how much success you see. It took me breaking my wrist quite badly in two places (the bone actually punctured and went totally through my muscles and nerves like a die-punch – gross) and a resulting medical diagnosis of permanent chronic pain and nerve damage to actually slow me down to a stop. But the trauma of the diagnosis isn’t the story, it’s the leaning in to myself that is. It’s in being true to oneself, it’s in reclaiming and finding yourself and taking the time needed to do that.
And it has taken longer than I expected but I have been feeling a great shift like an iceberg that is slowly melting. And as that iceberg melts I start to rediscover myself again, parts that have been frozen for awhile: my love of cooking, of gardening, of seeking higher truths. All small things, but all very big things to me. I have, as of yet, not taken any pictures with my “real” camera since the wrist break. For half-a-year it was too heavy for me to lift or support, or even hold because of the bend it required in my wrist and then for the other half I was moving into a new home. Not taking pictures with my “real” camera is a big thing for me since I have had a camera in hand for as long as I can remember and live to document everything around me. I suppose now that everyone has a phone camera, the larger becomes more obsolete – but for me it is an extension of myself. I of course never stopped taking photos on my camera phone, thank goodness.
Recently, on a lazy Sunday I made an apple cherry pie recipe that I had found in a recent issue of Better Homes & Gardens. I was out of butter so used lard instead (yes, my husband keeps frozen lard on hand) and I even went so far as to make a lattice pattern on it. As the pie was being prepared, the light in the kitchen was perfect and I recognized it as a photo moment. I improvised with my camera phone (my real camera having run out of charge long ago) and starting shooting like I did before, when I had time, when I wasn’t preoccupied with shop ownership.
This Thanksgiving I will be making my own version of apple pie in honor of my Grandmother, this one that is a little tart and a little sweet and filled with apples and cherries and an amazing crust, similar to hers, but different. Inspired by her but with my stamp on it, and my daughter will be helping me make it. I am so thankful for lazy Sunday’s, for slowing down, for having a phone with a camera on it, for reclaiming old things, and for essentially being the same, despite great shifts.
Apple-Double Cherry Pie Recipe
Author: Michelle Smith | Gather Goods Co
Prep time:
Cook time:
Total time:
Ingredients
2 cups frozen pitted tart cherries
2 cups frozen pitted dark sweet cherries
Pie Crust recipe (see below)
3/4 cup sugar
3 tbsp cornstarch
1/8 tsp cayenne pepper
4 cups thinly sliced, peeled baking apples
milk
sugar
Instructions
Thaw cherries, overnight or in a microwave. Preheat oven to 450. Drain cherries saving 1/4 cup of the juice. Make your pie crust: on a lightly floured surface, roll half of the dough into a 12-inch circle with a rolling pin. Line a 9-inch pie plate with your round pastry circle.
Combine sugar, cornstarch and cayenne in an extra large bowl. Add apples, cherries and reserved juice, tossing gently to coat. Fill pie pastry with the mixture of fruit. Trim the pastry 1 inch beyond the pie plate rim and fold the pastry back over the rim.
Roll out the reserved half of the pastry to about 1/8″ thick. Cut into long strips if you want to make a woven lattice pattern. Weave the dough strips so that they make a basket weave type pattern, up and down and over and under each other. If you want to decorate the edges of the pie you can use a fork to crimp the edges. Brush the dough with milk and sprinkle with remaining sugar. Place a baking sheet lined with foil below the pie in the oven to catch any spills.
Bake, uncovered for fifteen minutes. Reduce oven temperature to 375. Bake for an hour and 20 minutes up to an hour and 30 minutes or unitl the pie filling is bubbly and pastry is golden but not brown. Cool for 30 minutes before serving.
Today in Raleigh the weather is hovering around 65 degrees. This past weekend we were snowed in and school was cancelled for many days for my daughter. I’ve lived here in North Carolina for sixteen years now and the weather still surprises me. Growing up in Northern Virginia when it snowed it was more than just a dusting and you went to school and drove unless there were more than a few inches on the ground. Regardless, because it happens so rarely here it becomes an event and it’s fun to hunker down and treat it as the special occasion that it is.
In our house when we don’t have projects going on (and the busy holiday season has passed as well as peppermint bark production) we usually spend our spare time cooking. Many recipes are too time consuming to create on busy weeknights so weekends and snow days are perfect for them. So this weekend, as the snowflakes were falling, my husband got the urge to make homemade pretzels. They are really easy to make and you probably have most of the ingredients on hand. We made both traditional shaped pretzels and also shaped them into rolls. My brother works in the restaurant industry and at one of the restaurants where he worked they served hot pretzel rolls and they were mind blowing. The rolls make delicious sandwiches when they are heated up with some ham and melted cheese as well.
22 ounces all-purpose flour, approximately 4 1/2 cups
2 ounces unsalted butter, melted
Vegetable oil, for pan
10 cups water
2/3 cup baking soda
1 large egg yolk beaten with 1 tablespoon water
Pretzel salt
Instructions
Combine the water, sugar and kosher salt in the bowl of a stand mixer and sprinkle the yeast on top. Allow to sit for 5 minutes or until the mixture begins to foam. Add the flour and butter and, using the dough hook attachment, mix on low speed until well combined. Change to medium speed and knead until the dough is smooth and pulls away from the side of the bowl, approximately 4 to 5 minutes. Remove the dough from the bowl, clean the bowl and then oil it well with vegetable oil. Return the dough to the bowl, cover with plastic wrap and sit in a warm place for approximately 50 to 55 minutes or until the dough has doubled in size.
Preheat the oven to 450 degrees F. Line 2 half-sheet pans with parchment paper and lightly brush with the vegetable oil. Set aside.
Bring the 10 cups of water and the baking soda to a rolling boil in an 8-quart saucepan or roasting pan.
In the meantime, turn the dough out onto a slightly oiled work surface and divide into 8 equal pieces. Roll out each piece of dough into a 24-inch rope. Make a U-shape with the rope, holding the ends of the rope, cross them over each other and press onto the bottom of the U in order to form the shape of a pretzel. Place onto the parchment-lined half sheet pan.
Place the pretzels into the boiling water, 1 by 1, for 30 seconds. Remove them from the water using a large flat spatula. Return to the half sheet pan, brush the top of each pretzel with the beaten egg yolk and water mixture and sprinkle with the pretzel salt. Bake until dark golden brown in color, approximately 12 to 14 minutes. Transfer to a cooling rack for at least 5 minutes before serving.
3.5.3208
Do you have a go-to recipe or family tradition when you are snowed in?
Rhubarb is a vegetable that looks like red celery and uncooked tastes somewhat green like a sour apple, but, when it is cooked and combined with sugar it takes on a delicious flavor that compliments many dishes and pairs especially well with strawberry. Both rhubarb and strawberries are in season around the same time from mid May to the beginning of June here in the Piedmont area of North Carolina. One lazy Sunday afternoon, with a bucket of fresh picked strawberries straight from a farm down the road, my husband and I decided to make a rhubarb cake with buttermilk and strawberries.
The resulting cake is light, delicious and easy to make, and when paired with vanilla ice cream it becomes even more sublime. The rhubarb and strawberries can be replaced with any fruit and would continue to yield an excellent dessert, we think plums would be especially delicious. Below is the recipe. If you make it, let us know how it turned out.
Strawberry Rhubarb Buttermilk Cake
Prep time:
Cook time:
Total time:
Serves: 6 servings
Ingredients
1 cup all-purpose flour
1/2 teaspoon baking powder
1/2 teaspoon baking soda
1/4 teaspoon salt
1/2 stick unsalted butter, softened
2/3 cup plus 1 1/2 tablespoons sugar, divided
1/2 teaspoon pure vanilla extract
1 large egg
1/2 cup well-shaken buttermilk
1 cup fresh strawberries
1 stalk of rhubarb
Instructions
Preheat oven to 400°F and put your rack in the middle. Butter and flour a 9-inch round cake pan.
Whisk together flour, baking powder, baking soda, and salt.
Beat butter and 2/3 cup sugar with a mixer at medium-high speed for about 2 minutes until pale and fluffy, then beat in vanilla. Add egg and beat well.
Mix in the flour mixture at low speed in 3 batches, alternating with buttermilk, beginning and ending with flour, and mixing until just combined.
Spoon batter into cake pan, smoothing top. Cut rhubarb stalk into small chunks, scatter those and the strawberries evenly over top and sprinkle with remaining 1 1/2 tablespoons sugar.
Bake until cake is golden and a wooden pick inserted into center comes out clean, 25 to 30 minutes. Cool in pan 10 minutes, then turn out onto a rack and cool to warm, 10 to 15 minutes more. Invert onto a plate.
3.5.3208
Recipe adapted from this raspberry buttermilk cake from Epicurious
Photos by Michelle Smith. Hire me for your next project.